
10 Tiling Tools for Your Next Bathroom Remodel
Top 10 Tiling Tools for Your Next Bathroom Remodel
When embarking on a bathroom remodel, having the right tiling tools at your disposal is essential for a successful and efficient project. Whether you’re an experienced DIY enthusiast or a professional contractor, the right tiling tools can make all the difference in achieving a flawless tile installation. In this article, we’ll introduce you to the top 10 tiling tools you need for your next bathroom remodel. These tools will help you achieve precise tile installation and ensure your project’s success.
1. Tiling Tools
- Tile Cutter: A good quality tile cutter is a must for precise tile cuts. It’s an essential tool for any tile project.
- Wet Saw or Tile Cutter: A wet saw or tile cutter is perfect for cutting through porcelain, ceramic, and stone tiles.
- Grout Float: A grout float helps you evenly apply and press grout into the joints between tiles.
- Mixing Paddle: Mixing paddles ensure you achieve the right consistency when preparing thinset or adhesive.
- Grout Sponge: A grout sponge is essential for cleaning excess grout from tile surfaces.
- Notched Trowel: This tool is used to apply adhesive or thinset to the substrate before laying tiles.
- Tile Nippers: Tile nippers come in handy for making irregular or custom cuts in tiles.
- Chalk Line: A chalk line ensures your tiling area stays in alignment with straight lines.
- Bubble Level: A bubble level helps maintain level layout lines and tile alignment.
- Rubber Mallet: A rubber mallet is used for gently tapping tiles into place without causing cracks.
- Plastic Buckets: You’ll need plastic buckets for various tasks, such as mixing grout or rinsing tools during the grouting process.
Tiling Tools in Detail
1. Tile Cutter
A tile cutter is a versatile tool used for straight cuts in ceramic and porcelain tiles. It’s perfect for achieving clean and precise tile edges, making it a go-to tool for tile projects.
2. Wet Saw or Tile Cutter
For more challenging tile materials, such as stone or glass, a wet saw or tile cutter is indispensable. It employs a continuous stream of water to keep the blade cool, preventing overheating and ensuring smoother cuts.
3. Grout Float
A grout float, also known as a grout trowel, is essential for spreading grout evenly over tile surfaces and forcing it into grout joints. It’s a crucial tiling tool for achieving a professional finish on your tile project.
4. Mixing Paddle
Mixing paddles attach to a drill and are used to efficiently mix thinset or adhesive. This tool guarantees that your tile adhesive is the right consistency, ensuring a strong bond between the tiles and the substrate.
5. Grout Sponge
After applying grout, a grout sponge is used to remove excess grout from tile surfaces and smooth the grout joints. A household sponge won’t do the job as effectively as a specialized grout sponge.
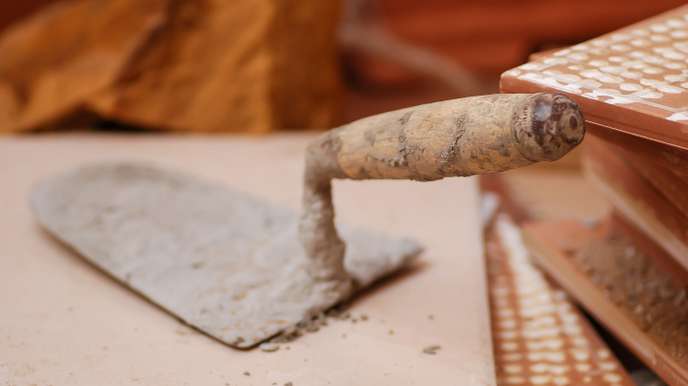
6. Notched Trowel
The notched trowel is a vital tiling tool for applying adhesive or thinset to the substrate. The size of the trowel and notch pattern used depends on the type and size of the tile being installed.
7. Tile Nippers
Tile nippers are designed for making irregular or custom cuts in tiles. Whether you need to fit tiles around pipes or create intricate designs, tile nippers are your go-to tool.
8. Chalk Line
A chalk line is used to mark straight lines on your tiling surface, ensuring that your tiles are laid out evenly and accurately.
9. Bubble Level
A bubble level is used to maintain level layout lines and ensure that your tiles are aligned correctly. It’s an indispensable tool for creating a neat and professional look.
10. Rubber Mallet
A rubber mallet is used to gently tap tiles into place. This tool helps prevent cracked tiles and ensures that all tiles are level and securely set.
11. Plastic Buckets
Plastic buckets are essential for mixing grout, carrying tiles, or rinsing tools during the grouting process. They help keep your workspace organized and efficient.
In conclusion, having the right tiling tools is the key to a successful bathroom remodel. These top 10 tools, ranging from tile cutters to rubber mallets, play a pivotal role in achieving a professional finish. Whether you’re a seasoned pro or a passionate DIY enthusiast, investing in quality tools is a surefire way to make your next bathroom project a resounding success.
But the journey doesn’t end here. For an in-depth exploration of essential tools for your bathroom remodel, we invite you to read HomeFixology’s comprehensive article on the top tools used for a DIY bathroom remodel. Delve deeper into the world of tiling, uncover additional tips and tricks, and gain a more profound understanding of each tool’s nuances to ensure your bathroom renovation is a triumph.
Frequently Asked Questions
Q1. What are the basic tools needed for a bathroom remodel? A1. The basic tools for a bathroom remodel include a tile cutter, wet saw or tile cutter, grout float, mixing paddle, grout sponge, notched trowel, tile nippers, chalk line, bubble level, rubber mallet, and plastic buckets.
Q2. Why is a wet saw or tile cutter essential for a bathroom remodel? A2. A wet saw or tile cutter is crucial for cutting challenging materials like stone or glass with precision, ensuring your tiles fit perfectly.
Q3. How do I choose the right size notched trowel for my tile project? A3. The size of the notched trowel depends on the type and size of the tile you’re installing. Follow the manufacturer’s recommendations for the adhesive you’re using.
Q4. What is the purpose of a chalk line in tiling projects? A4. A chalk line is used to mark straight lines on the tiling surface, ensuring that your tiles are evenly and accurately laid out.
Q5. Why is a bubble level important in a bathroom remodel? A5. A bubble level helps maintain level layout lines and ensures that your tiles are aligned correctly, resulting in a professional and visually appealing finish.


